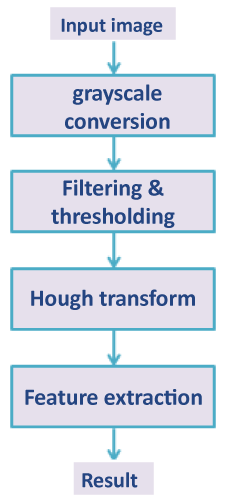
Figure 3:
Overview of the algorithm