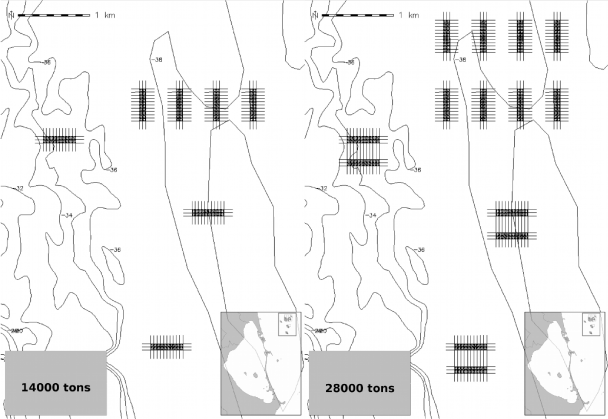
Figure 6:
Carrying capacity study for San Pedro, alternative I (left) and II (right) description map.