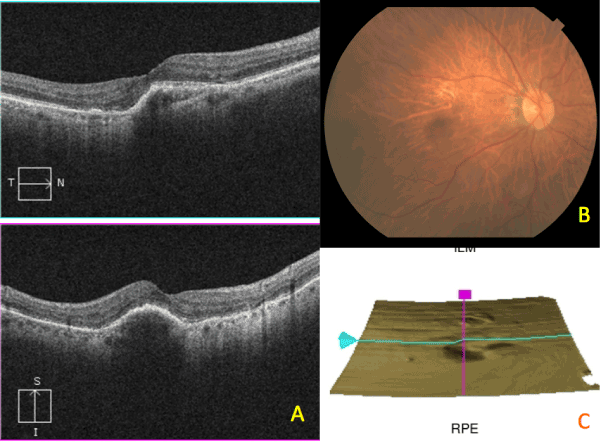
Figure 9:
Patient 7: Before and After treatment, A: PED prior to rip, B: Colour photo showing rolled RPE, C: RPE map showing scrolled RPE.