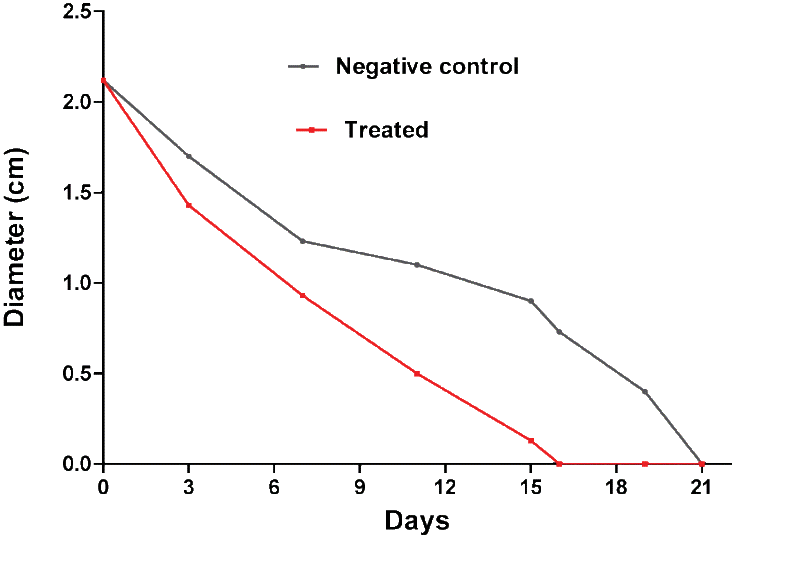
Figure 3:
Differences between negative and treated lots.