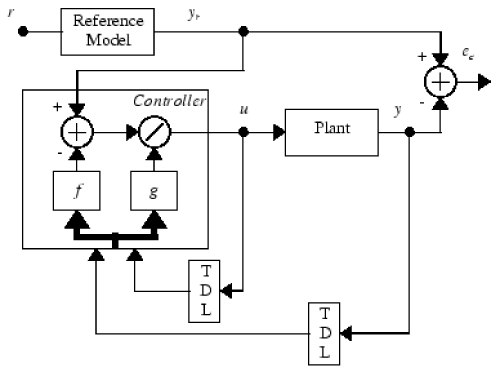
Figure 2:
Block diagram of the NARMA-L2 control.