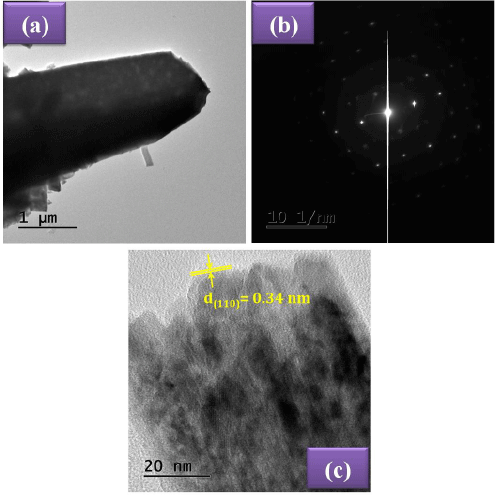
Figure 4:
(a) Shows TEM image, (b) SAED pattern and (c) HRTEM image of sample T
3
.