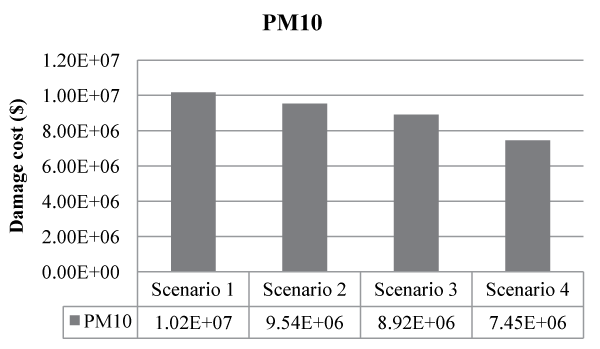
Figure 3:
Total damage cost for each scenario.